
This blog post is for you if you’ve heard of the model context protocol (MCP) and are curious how you could implement something in Python such that you can try it with your local models that are capable of tool use, e.g. via Ollama. Maybe you even looked at the documentation but felt there still was something missing for you to get started?
At least that’s how I felt. The “easiest” / Stdio server verison worked immediately but when I wanted to use a HTTP server I was sort of stranded. It was unclear to me how to actually run the server and what the client needs where so it can successfully talk to the server. Don’t get me wrong, the MCP and PydanticAI documentation is pretty good, but things could always be easier, could they not? 😛 Maybe I’ll save you some time with this post.
Model Context Protocol?
The MCP is designed to create servers that provide resources, prompts and tools and client that know how to handle those. The tools are intended to be directly used by language models from the side of the client.
So the examples here will only make use of the tools part of the MCP.
Types of servers
There are two types: Stdio and HTTP MCP servers. In my repo is one example for the Stdio type and three for the HTTP type, using mcp.run directly, or FastAPI or Starlette. You can find those in the following repo folders
- Stdio -> examples/0_subprocess
- HTTP mcp.run -> examples/1_http_mcp_run
- HTTP fastapi -> examples/2_http_fastapi
- HTTP starlette -> example/3_http_starlette
Differences in Code
Following are the main differences in the implementation as I see them. For a more complete picture I recommend the links above and file diffs. 🙂
Client side
# stdio / subprocess server
def get_stdio_mcp_server() -> MCPServerStdio:
    return MCPServerStdio("uv", args=["run", "server.py", "server"])

# http server: mcp.run / fastapi / starlette
def get_http_mcp_server(port: int = PORT) -> MCPServerHTTP:
    return MCPServerHTTP(url=f"http://localhost:{port}/mcp")
For the Stdio server the client we need to define how to run the server.py script, e.g. using uv in def get_stdio_mcp_server above.
For the HTTP server we only need to provide the URL, but that URL needs to be correct. 😀 The last part of the path is important, otherwise you get irritating error messages.
Server side
The first example pretty much looks like
# examples/0_subprocess/server.py

from mcp.server.fastmcp import FastMCP
from typing import Literal

mcp = FastMCP("Stdio MCP Server") # server object

@mcp.tool() # register tool #1
async def get_best_city() -> str:
    """Source for the best city"""
    return "Berlin, Germany"

Musicals = Literal["book of mormon", "cabaret"]

@mcp.tool() # register tool #2
async def get_musical_greeting(musical: Musicals) -> str:
    """Source for a musical greeting"""
    match musical:
        case "book of mormon":
            return "Hello! My name is Elder Price And I would like to share with you The most amazing book."
        case "cabaret":
            return "Willkommen, bienvenue, welcome! Fremde, étranger, stranger. Glücklich zu sehen, je suis enchanté, Happy to see you, bleibe reste, stay."
        case _:
            raise ValueError

mcp.run() # start the server
Quite beautifully easy.
The 1_http_mcp_run example is actually only a little bit different
# examples/1_http_mcp_run/server.py

# stuff

mcp = FastMCP(
    "MCP Run Server",
    port=PORT, # <- set this
)

# stuff

mcp.run(transport="streamable-http") # <- set this transport value
So mainly we have to set a port value and the transport value. Easy peasy.
What about fastapi / starlette + uvicorn?
# examples/2_http_fastapi/server.py - starlette version is very similar

# stuff

mcp = FastMCP(
    "MCP Run Server"
) # no port argument needed here

# stuff

@contextlib.asynccontextmanager
async def lifespan(app: FastAPI):
    async with contextlib.AsyncExitStack() as stack:
        await stack.enter_async_context(mcp.session_manager.run())
        yield

app = FastAPI(lifespan=lifespan) # try removing this and running the server ^^
app.mount("/", mcp.streamable_http_app())

uvicorn.run(app, port=PORT)
Well dang! Still relatively easy but some added work needed in defining the lifespan function and making sure the path is mounted correctly.
Running it
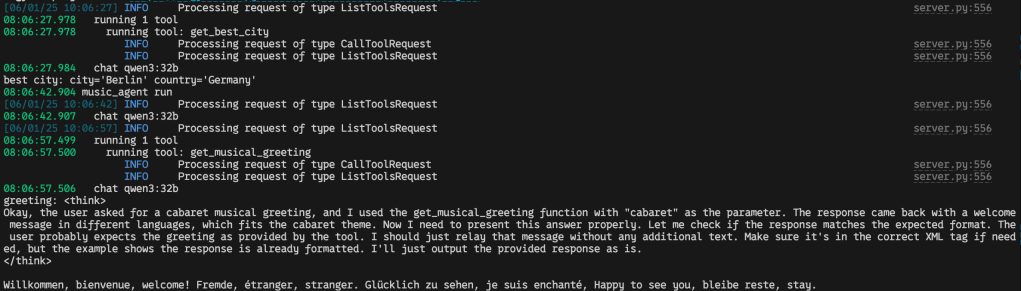
It’s documented here, but I’ve written the scripts such that all you need is python server.py and python client.py.
Then in your python client.py terminal it should look something like
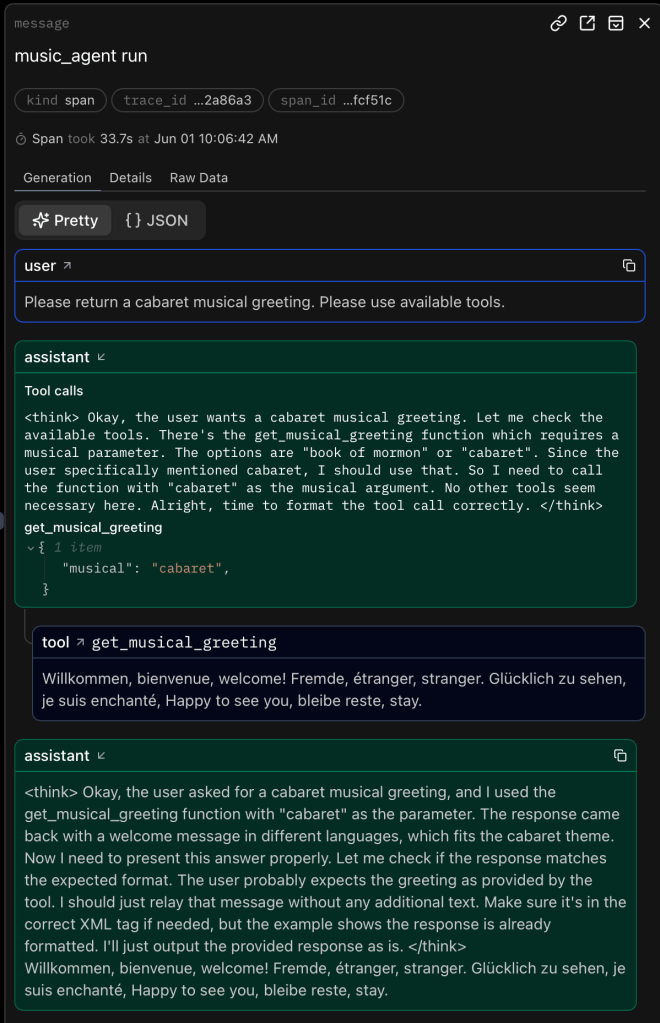
If you use logfire as set up in the client.py scripts and register an account with logfire you should be able to see the prompts and responses neatly like

and
Auf Wiedersehen, au revoir, goodbye
That’s it. Happy coding! 🙂
Links to things
- My repo with the example https://github.com/eschmidt42/pydantic-ai-mcp-experiment
- The model context protocol https://modelcontextprotocol.io/introduction
- The python-sdk for the model context protocol https://github.com/modelcontextprotocol/python-sdk
- PydanticAI’s model context protocol guide https://ai.pydantic.dev/mcp/
- PydanticAI’s logfire https://logfire.pydantic.dev/docs/
- Starlette https://www.starlette.io
- FastAPI https://fastapi.tiangolo.com
- Ollama https://ollama.com
